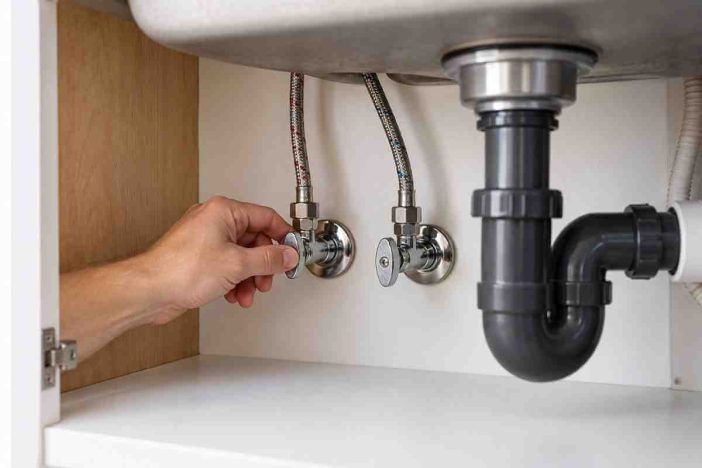
The new faucet cartridge is already sitting on the counter.
The tools are ready. The cabinet beneath the kitchen sink has been emptied. What looked like a thirty-minute repair should be straightforward.
Then you reach for the shutoff valves.
The cold-water valve closes normally.
The hot-water valve does not move.
Or perhaps the handle turns, but opening the faucet proves that the water never actually stopped.
That small valve has suddenly become the most important part of the repair.
A shutoff valve under a sink that won’t close is not simply an inconvenience. It means the fixture cannot yet be isolated reliably. Forcing the handle, loosening connections while the line is still pressurized, or assuming that “almost closed” is good enough can turn a faucet problem into a cabinet, flooring, or plumbing problem.
The useful question is therefore not:
“How hard can I turn this valve?”
It is:
What exactly has failed, and what is the safest next isolation point?
Quick Answer
If a kitchen sink shutoff valve will not close, do not force it with pliers, a wrench, or extra leverage.
First determine what the valve is actually doing:
- the handle will not move;
- the handle moves but water continues flowing;
- the valve reduces flow but does not stop it;
- the handle spins without normal resistance;
- the valve begins leaking when operated; or
- corrosion or mineral buildup makes the valve condition questionable.
For faucet work, the hot- and cold-water supplies must be reliably isolated before the faucet is disassembled. If either local shutoff cannot do that, stop the fixture repair and use the home’s private main water shutoff only if you know which valve it is and can operate it safely.
Do not assume that a valve inside a meter box or near the street belongs to the homeowner. Utility-owned valves and curb stops may require utility authorization.
A shutoff valve that no longer performs its basic isolation function generally needs repair or replacement rather than progressively more force.
What the Shutoff Valves Under Your Kitchen Sink Actually Do
Most kitchen faucets receive water through separate hot- and cold-water supply paths.
The small valves beneath the sink allow those individual supplies to be isolated without shutting down water to the entire house.
Understanding that arrangement is easier when you first understand the larger kitchen plumbing system: pressurized supply water enters the kitchen, individual fixture valves control selected branches, and wastewater leaves through a completely separate drainage system.
Under a typical sink, you may encounter:
- one valve for the cold-water faucet supply;
- one valve for the hot-water faucet supply;
- a dual-outlet valve that also serves a dishwasher, filter, or another appliance;
- an angle stop that changes the direction of flow;
- a straight stop installed inline with the pipe.
The handle design also matters.
Multi-Turn Shutoff Valves
A traditional multi-turn valve requires several turns of the handle to move from open to closed.
Internal components gradually move into position to stop the water.
These valves can remain untouched for years. When they eventually need to operate, age, deposits, wear, or internal deterioration may prevent them from moving or sealing normally.
Quarter-Turn Shutoff Valves
A quarter-turn stop operates through approximately a 90-degree movement between its open and closed positions.
Modern versions commonly use a ball-style mechanism and are popular because the operating position is easier to identify and the movement is simple.
Neither design should be judged only by appearance.
A clean-looking valve can fail internally.
A discolored valve may still function.
The correct diagnosis comes from how the valve moves, whether it stops the flow, and whether it remains dry under pressure.
Identify Which Failure You Actually Have
“Shutoff valve won’t close” can describe several different failures.
That distinction determines what you should do next.
| What You Observe | What It May Mean | Best Next Step |
|---|---|---|
| Handle will not move normally | Seized stem, deposits, corrosion, internal damage | Stop before adding leverage |
| Handle turns but faucet still receives water | Valve is not sealing internally, wrong valve, or another supply remains open | Verify both supplies and test isolation |
| Flow becomes weaker but never stops | Partial internal closure or damaged sealing components | Treat valve as unreliable |
| Handle spins unusually freely | Handle-to-stem or internal mechanism may no longer engage | Stop using it as a dependable shutoff |
| Valve starts dripping when moved | Stem, packing area, fitting, or valve body may be leaking | Stop manipulation and isolate upstream if needed |
| Visible green, white, rust-colored, or heavy mineral buildup | Possible long-term seepage or deterioration | Evaluate replacement rather than forcing |
| Valve closes and faucet stops, but cabinet becomes wet | Supply-line or valve connection may be leaking | Find the first wet point before continuing |
| Valve is fully open but faucet flow is weak | Restriction may involve the valve, supply line, faucet, cartridge, or outlet | Use the low-flow diagnostic sequence |
If the problem is weak faucet flow rather than inability to isolate the fixture, use the separate low water pressure in kitchen faucet diagnostic guide. Weak flow and a failed shutoff are related supply-side symptoms, but they are not the same problem.
Check what you observe before buying parts or continuing faucet disassembly. This record is designed to identify the failure state, not to replace a plumbing inspection.
1. Which valve is affected?
2. What does the handle do?
3. What happens to water flow?
4. Does the valve remain dry?
5. Visible condition
6. Valve configuration
7. Upstream isolation
8. Current next step
Step 1: Stop the Repair Before Disconnecting Anything
The most important diagnostic move is often the easiest:
do not proceed with faucet disassembly until you know the water is truly isolated.
A shutoff handle reaching what looks like its closed position does not prove that the valve is holding.
Before removing a cartridge, supply hose, faucet, or connection:
- Close the appropriate fixture shutoff valves using normal operation only.
- Open the kitchen faucet.
- Move the faucet through the hot and cold positions.
- Observe whether pressurized flow stops.
A brief release of residual water can be normal after the valves are closed.
Continued pressurized flow is different.
If water continues running, the fixture has not been reliably isolated.
For a typical faucet replacement or internal faucet repair, both the hot and cold supplies need to be controlled.
Do not disconnect a supply line simply because one side of the faucet appears to have stopped.
Step 2: Determine Whether One Valve or Both Valves Are the Problem
A kitchen sink usually gives you two local isolation points.
Test the situation systematically.
If the cold valve operates normally but the hot valve will not close, the diagnostic area becomes much smaller.
The same applies in reverse.
If neither valve works normally, the problem may reflect:
- two aging fixture stops;
- valves that have not been operated for a long time;
- widespread corrosion or mineral buildup;
- previous plumbing work;
- an installation where the apparent valves are not controlling what you expected.
Do not immediately assume that both faucet supplies are defective simply because water still appears at the spout.
Verify which line each valve serves.
This is especially important when the cabinet contains a dishwasher connection, filtration system, instant-hot dispenser, refrigerator line, or dual-outlet stop.
Step 3: Look at the Valve Before You Try to Move It Again
Use a flashlight.
Dry the cabinet floor and the valve with a paper towel or clean cloth.
Then inspect the valve without disassembling it.
Look for:
- moisture beneath the handle;
- droplets at the outlet connection;
- dampness where the valve meets the pipe;
- green or white deposits;
- rust-colored staining;
- cracking;
- deformation;
- a loose handle;
- a supply hose under tension;
- a pipe that moves when the valve is touched.
A valve should not require the surrounding pipe to twist in order for the handle to operate.
If the pipe, fitting, or valve body appears fragile, heavily corroded, unsupported, or already wet, the risk has changed.
This is no longer simply a stiff handle.
It is a potentially unreliable pressurized connection.
Step 4: If the Handle Will Not Turn, Do Not Escalate the Force
This is where many small jobs become larger jobs.
A homeowner feels resistance.
The natural reaction is to reach for larger pliers.
That creates a dangerous assumption:
more torque will solve the problem before something else gives way.
It may not.
The handle, stem, valve body, connection, or pipe behind the valve can be weaker than the resistance you are trying to overcome.
If a valve will not operate using ordinary hand pressure and its normal handle, stop.
Do not:
- add a long wrench for leverage;
- lock pliers onto a decorative handle;
- twist the valve body against the pipe;
- strike the valve;
- heat the assembly;
- loosen the valve while it is pressurized.
The repair objective is controlled isolation.
A method that risks losing control of the water supply defeats that objective.
Step 5: If the Handle Turns but the Water Keeps Running, Test the Result—Not the Handle
A moving handle can create false confidence.
The valve may reach its normal-looking closed position while water continues to pass internally.
This can happen when internal sealing components are worn, damaged, obstructed, or no longer contacting the sealing surface correctly.
The practical test is simple:
Does the valve actually isolate the fixture?
If the answer is no, treat it as a failed shutoff even if the handle feels normal.
Do not compensate by tightening the handle progressively harder.
A shutoff valve is valuable because it provides predictable control.
A valve that “mostly closes” is not dependable enough for a repair that requires an open water connection.
Step 6: If the Valve Starts Leaking When You Operate It, Find the First Wet Point
A dry valve that starts dripping after it has been moved deserves immediate attention.
Do not assume every leak comes from the same component.
Dry the assembly again and watch where moisture first appears.
Water Appears Beneath the Handle
The leak may be associated with the stem or sealing area around the operating mechanism.
A small stem-area seep on an otherwise sound serviceable valve is different from a cracked valve body, but it still means the valve should not be ignored.
Water Appears at the Supply-Line Connection
The problem may involve the connection between the fixture stop and the flexible faucet supply line.
Do not keep tightening the fitting aggressively.
Overtightening can damage sealing components or fittings instead of improving them.
If a supply connector is corroded, kinked, damaged, or leaking, read the braided stainless steel supply-line lifespan and replacement guide before deciding whether that connector should remain in service.
Water Appears Where the Valve Meets the Wall or Floor Pipe
This is more concerning because the problem may involve the valve inlet, the pipe connection, or movement at the stub-out.
Stop manipulating the valve.
A repair at this location can depend heavily on the pipe material and connection method.
Water Comes From the Valve Body
A cracked, badly deteriorated, or visibly leaking valve body should not be treated as a handle-adjustment problem.
Move upstream to a safe isolation point and have the failed stop evaluated.
Step 7: Know When to Use the Main Water Shutoff
If the local kitchen valve cannot reliably stop the water, the next control point is usually the home’s private main shutoff.
That does not mean experimenting with every valve you can find.
Use the main only when:
- you can positively identify it;
- it belongs to the home or unit you are authorized to control;
- the route to it is safe and dry;
- the valve itself does not appear damaged or dangerously corroded;
- you understand its normal method of operation.
After closing the private main, open a faucet to relieve pressure and verify that the water supply has actually stopped before opening plumbing connections.
If the private main is also stuck, leaking, inaccessible, or uncertain, stop.
Do not automatically move to a curb stop, street valve, meter valve, shared-building control, fire-sprinkler valve, or another unidentified valve.
Water-utility equipment ownership and operating rules vary.
In apartments, condominiums, and multifamily buildings, the correct next step may be the building manager, maintenance team, plumber, or water utility rather than a valve inside a shared service area.
A Valve That Partially Closes Is Still a Failed Isolation Point
Sometimes a fixture stop appears to work because faucet flow becomes much weaker.
That can be misleading.
Reducing the flow is not the same as creating a safe repair condition.
Imagine a valve reduces faucet flow by 90 percent.
That sounds effective while the faucet is assembled and discharging into the sink.
Disconnect the supply hose, however, and that remaining water now has another exit path.
The valve therefore fails the only standard that matters for disassembly:
Can it reliably isolate the line?
If not, move upstream before continuing.
Do Not Confuse a Shutoff-Valve Problem With a Faucet Problem
The faucet and the shutoff valves are separate components.
A leaking faucet may have a worn cartridge, seal, O-ring, washer, hose, or connection while both local shutoffs still work perfectly.
Conversely, the faucet may be in excellent condition while one fixture stop has seized or failed internally.
If water is escaping from the faucet itself rather than the shutoff assembly, use the dedicated leaking kitchen faucet repair guide to identify the actual leak source.
This distinction prevents unnecessary work.
Replacing a cartridge will not repair a failed angle stop.
Replacing an angle stop will not repair a faucet that drips from a worn cartridge.
Diagnose the component that has failed.
Multi-Turn vs Quarter-Turn: Does Valve Type Change the Decision?
It changes the mechanism, but not the safety principle.
When a Multi-Turn Valve Fails
Older multi-turn stops may develop problems involving:
- stem movement;
- washers or internal seals;
- mineral deposits;
- worn seating surfaces;
- packing around the stem;
- corrosion.
Some multi-turn designs can be serviced when the valve body and connection remain sound.
That does not mean every old valve should be rebuilt.
A valve with significant corrosion, questionable pipe connections, repeated leakage, or unreliable isolation may be a poor candidate for retaining old components simply because a replacement part exists.
When a Quarter-Turn Valve Fails
Quarter-turn fixture stops typically use a simpler operating movement.
If the handle reaches its normal closed position but the valve continues passing water, the internal mechanism is no longer performing the required isolation function.
Do not attempt to solve that failure with additional handle force.
The valve needs evaluation and, in many cases, replacement.
Manufacturer literature from major supply-stop manufacturers distinguishes between multi-turn and quarter-turn designs, but the correct replacement still depends on the exact inlet connection, outlet size, pipe material, and installation.
Repair or Replace the Shutoff Valve?
The better question is not simply whether the valve can be made to move again.
Ask whether it can remain a dependable emergency isolation point.
Replacement becomes more compelling when:
- the valve does not fully stop water;
- the handle or mechanism is damaged;
- the body shows meaningful corrosion;
- the valve leaks when operated;
- the pipe connection is questionable;
- the valve has already failed during required maintenance;
- previous repairs have not restored reliable operation.
A limited repair may make sense when the valve design is serviceable, the body is in good condition, the connection is sound, and the exact failed component has been identified.
The decision should become more conservative as visible deterioration increases.
A fixture shutoff is inexpensive compared with the consequence of discovering during an emergency that it cannot stop water.
Why You Should Not Buy a Replacement Valve Before Identifying the Connection
A shutoff valve is not selected by handle shape alone.
The pipe entering the valve may be:
- copper;
- PEX;
- CPVC;
- threaded pipe;
- another approved plumbing material or adapter system.
The valve may attach through:
- compression;
- threads;
- soldered connections;
- crimp or clamp systems;
- push-to-connect fittings;
- other manufacturer-specific connection methods.
The outlet serving a typical faucet supply also has to match the required connector.
Then consider the geometry.
An angle stop may be appropriate when the supply comes from the wall and turns toward the fixture.
A straight stop may make more sense where the piping arrangement continues in the same direction.
Some kitchen installations use dual outlets.
That is why “buy another silver valve that looks the same” is not a reliable replacement specification.
Identify:
pipe material → inlet connection → outlet connection → valve configuration → available space.
When those five variables are known, replacement becomes a plumbing decision instead of a guess.
Check the Supply Line at the Same Time
The stop and the flexible supply line work as one assembly.
If a valve is old enough to have seized, leaked, or lost its ability to close, inspect the attached connector before automatically reusing it.
Look for:
- damaged braid;
- corrosion at the ends;
- kinks;
- twisting;
- staining;
- damaged nuts;
- moisture;
- a hose stretched tightly between the valve and faucet.
Do not replace a reliable connector solely because a calendar says it is old.
Condition, manufacturer guidance, installation, service history, and compatibility matter.
But opening an old plumbing connection is a sensible moment to assess whether the connected component still deserves to go back into service.
Common Mistakes That Turn a Small Valve Problem Into a Bigger Repair
Forcing a Frozen Handle
Extra leverage transfers force somewhere.
If the internal stem does not move, that force may reach the handle, valve body, fitting, or pipe.
Disconnecting the Faucet Before Proving Isolation
A handle in the “off” position is not evidence.
Test the faucet first.
Assuming the First Valve You Find Controls the Faucet
Trace the line.
Modern kitchens may contain multiple water connections within one cabinet.
Tightening Every Nut That Looks Wet
First dry the assembly and locate the first wet point.
Water can run along a hose or valve body and drip somewhere far from the original leak.
Operating an Unknown Meter or Street Valve
The nearest upstream valve is not automatically homeowner-operated equipment.
Know ownership and local utility rules first.
Treating a Partially Closed Valve as Good Enough
Restricted flow is not isolation.
If the plumbing connection will be opened, the water supply must be under control.
Ignoring the Valve After the Original Faucet Repair Is Finished
If a stop failed when you needed it, the problem did not disappear simply because you postponed the faucet work.
The failed isolation point still exists.
What a Professional Will Usually Need to Determine
A plumber evaluating the valve is not looking only at the handle.
The larger decision includes:
- whether the valve can be isolated upstream;
- the condition of the stub-out;
- pipe material;
- existing connection method;
- valve configuration;
- outlet size;
- surrounding access;
- supply-line condition;
- corrosion or evidence of past leakage;
- whether another appliance shares the stop.
That is why replacement cost and difficulty can differ substantially between two valves that look almost identical from the front of a cabinet.
The visible valve may be simple.
What matters is what it is connected to.
After Repair or Replacement, Verify the Whole Assembly
A repair is not complete when the new component has merely been installed.
It is complete when the system has been restored and proven dry.
After water is returned:
- Keep the cabinet empty.
- Dry the valve, pipe, and supply-line connections.
- Restore pressure gradually.
- Run the faucet through hot and cold operation.
- Watch the valve under static pressure.
- Check every disturbed connection with a dry paper towel.
- Recheck after several minutes.
- Inspect again after normal kitchen use.
A connection can remain dry during the first few seconds and reveal a slow seep only after it has been under pressure.
Do not refill the cabinet immediately with cleaners, bins, and household supplies that hide the plumbing from view.
A Five-Minute Prevention Routine
The best time to discover an unreliable fixture stop is not while water is spraying across the cabinet.
Periodically look beneath the kitchen sink when nothing is wrong.
You are not trying to perform a full plumbing service.
You are checking whether something has changed.
Look for:
- new moisture;
- mineral deposits;
- discoloration;
- corrosion;
- swollen cabinet material;
- kinked supply hoses;
- objects pushing against plumbing;
- a valve handle that has been damaged or obstructed;
- changes after appliance, faucet, filter, or cabinet work.
Also know the location of the home’s private main shutoff before you need it.
That single piece of household information changes the risk of every future supply-side plumbing repair.
When to Call a Plumber Immediately
Stop DIY work and move toward professional help when:
- the valve or supply line is actively spraying;
- the valve body appears cracked;
- corrosion is severe;
- operating the valve causes the pipe behind it to move;
- water is emerging from the wall or floor connection;
- the fixture cannot be isolated;
- the private main shutoff does not work;
- you cannot confidently identify the correct upstream shutoff;
- the pipe material or connection method is unfamiliar;
- the valve begins leaking substantially after being touched;
- you would need excessive force to continue.
The threshold is not based on whether you own enough tools.
It is based on whether you can maintain control of the water supply while the plumbing is open.
Frequently Asked Questions
Can I replace a kitchen faucet if one shutoff valve will not close?
Do not open the faucet’s water connections until both hot and cold supplies can be reliably isolated. If one fixture stop fails, use a correctly identified private main shutoff or have the failed stop repaired before continuing.
Why does water still run after I close the valve under the sink?
A small amount of residual water can leave the faucet after isolation. Continued pressurized flow can mean the valve is not sealing, another supply remains open, or the valve you operated does not control the line you expected. Verify both hot and cold supplies before disassembly.
Is a quarter-turn valve better than a multi-turn valve?
Quarter-turn stops are popular because they move between open and closed positions with a short operating motion. Multi-turn stops remain common and can perform reliably. Connection compatibility, product quality, installation, condition, and the valve’s ability to isolate water matter more than simply counting handle turns.
Why did my shutoff valve start leaking after I turned it?
Moving an older valve can reveal deterioration around the stem, internal seals, fittings, or valve body that was not previously obvious. Dry the valve, identify where moisture begins, and stop operating it if leakage increases.
Should I tighten a leaking shutoff valve?
Do not apply blanket tightening to every leak. A stem-area seep, outlet fitting leak, inlet connection leak, and cracked valve body are different failures. Identify the leak source first. If the valve is corroded, damaged, cannot isolate water, or requires substantial force, upstream isolation and professional replacement are safer than continued tightening.
Can one under-sink valve control both the faucet and dishwasher?
Some installations use dual-outlet stops or other branch arrangements. Trace each supply line rather than assuming which fixture a handle controls. The dishwasher may have a separate outlet, separate valve, or another connection depending on the installation.
What if my main water shutoff also will not close?
Do not force an uncertain or deteriorated main valve and do not assume you can operate a utility-owned meter or curb stop. Contact a plumber, building manager, or serving water utility as appropriate so the correct upstream control can be identified and operated safely.
Final Takeaway
A kitchen sink shutoff valve has one critical job:
stop pressurized water when the fixture needs to be isolated.
If it cannot do that reliably, the problem is not solved by turning the handle harder.
Start by identifying the failure state.
Determine whether the valve is stuck, moving without sealing, leaking when operated, partially restricting flow, or simply controlling a different branch than expected.
Then move upstream before opening the plumbing.
That diagnostic discipline is the same systems-first approach used throughout the Kitchen Systems, Appliances & Efficiency Hub: understand where the failure occurs before replacing parts downstream.
A dependable shutoff valve is easy to forget when everything is working.
When something fails, it becomes one of the most important controls in the kitchen.