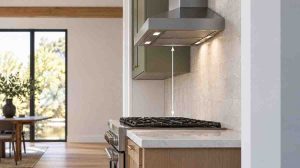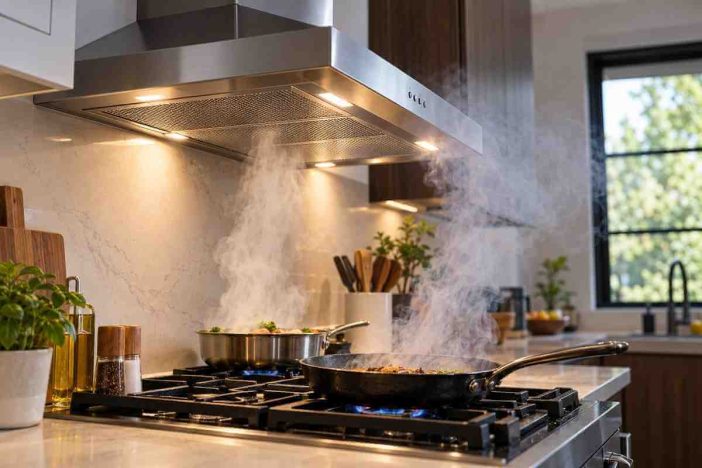
A skillet begins to smoke.
You switch the range hood from low to high.
The fan gets louder immediately.
But the smoke does not disappear upward the way you expected. Some curls around the front edge of the hood. Some moves sideways into the room. Minutes later, the kitchen still smells like dinner.
The obvious conclusion is:
the range hood is not pulling enough air.
Sometimes that is correct.
Sometimes the hood is moving plenty of air, but the cooking plume never enters it in the first place.
Those are two different failures.
One is primarily an airflow problem.
The other is primarily a capture problem.
Replacing a blower because of a capture problem can leave you with a more expensive hood that still lets smoke escape. Rebuilding ductwork when a grease filter is clogged can create the same kind of unnecessary repair.
The useful diagnostic question is therefore:
Where does the ventilation process stop working?
Quick Answer
If your range hood is running but not pulling smoke effectively, do not assume the motor is failing.
First determine whether the problem is weak airflow or poor capture.
A practical diagnostic order is:
- confirm whether the hood is ducted outdoors or recirculating;
- inspect and clean the grease filter;
- check whether an exterior damper or vent termination opens normally;
- evaluate the exhaust duct for restrictions, undersizing, sharp turns, or installation errors;
- verify that the hood is mounted within its intended height range and adequately covers the cooking surface;
- compare the installed hood’s capacity with the cooking load;
- consider building depressurization or insufficient replacement air;
- investigate the blower, controls, or internal appliance components only after the easier system-level causes are excluded.
A loud fan does not prove strong airflow.
And strong airflow does not guarantee good capture.
First Decide: Is This a Capture Problem or an Airflow Problem?
This distinction saves the most time.
Poor airflow
Air enters the hood weakly because something is restricting or failing within the exhaust path.
Possible locations include:
- a grease-loaded filter;
- a blocked charcoal filter;
- a stuck damper;
- a restricted exterior termination;
- an undersized or excessively restrictive duct;
- a disconnected or damaged duct;
- inadequate replacement air;
- a blower problem.
Poor capture
The hood may be moving air normally, but smoke, steam, grease aerosols, and odors are escaping around the canopy before entering the exhaust stream.
Possible causes include:
- front burners extending beyond effective hood coverage;
- excessive mounting height;
- shallow hood depth;
- insufficient hood width;
- island exposure;
- cross-drafts;
- cooking intensity beyond the hood’s practical capture ability.
Laboratory work from Lawrence Berkeley National Laboratory has demonstrated why the distinction matters: residential range-hood capture varies with airflow, hood geometry, mounting configuration, and burner location. Front-burner emissions can be substantially harder to capture than emissions generated farther beneath the hood.
That means a hood can have a respectable airflow rating and still perform poorly at the pan.
Use the Symptom Pattern Before Taking Anything Apart
| What You Notice | More Likely Diagnostic Direction |
|---|---|
| Rear burners capture well, front burners do not | Coverage, depth, height, or plume geometry |
| Hood is louder than before but airflow seems weaker | Filter, duct, damper, or blower restriction |
| Performance declined gradually | Filter loading, grease accumulation, damper, or developing mechanical problem |
| Performance was poor from the first day | Sizing, duct design, mounting, installation, or configuration |
| Highest speed adds noise but little apparent performance | Restriction, system resistance, or blower issue |
| Exterior damper barely opens | Weak exhaust flow, obstruction, damper problem, or restrictive duct |
| Smoke enters hood but odors linger | Exhaust/recirculation configuration, filter, or total ventilation performance |
| Smoke misses the hood at the front | Capture geometry more than raw suction |
| Performance noticeably changes when a nearby window is opened | Building pressure/replacement-air issue deserves investigation |
| One fan speed works but others do not | Control, motor, or appliance-specific fault |
Use this table to decide where to investigate next, not which part to order.
Check what you observe before replacing the hood or blower. The goal is to separate a capture problem from an airflow problem.
1. Basic configuration
2. When did the problem begin?
3. Filter condition
4. Smoke behavior
5. Exhaust path
6. Known duct condition
7. Hood geometry
8. Building pressure clue
9. Fan behavior
10. Most likely next diagnostic area
Step 1: Confirm Whether the Hood Actually Exhausts Outdoors
Before diagnosing suction, know what type of system you have.
A ducted range hood captures kitchen air and sends it through ductwork to an exterior wall or roof termination.
A recirculating hood filters air and returns it to the room.
Those systems should not be judged by exactly the same standard.
A recirculating hood may reduce some grease and odors, depending on its filters and design, but it does not physically exhaust the captured air outdoors.
So if the homeowner expectation is:
“I should see smoke disappear from the kitchen through the hood,”
first confirm whether an outdoor exhaust path actually exists.
Look for the model’s installation configuration and, where accessible, determine whether ductwork leaves the hood toward an exterior termination.
Do not assume that a decorative chimney cover proves the hood is ducted outdoors.
Step 2: Check the Grease Filter Before Blaming the Motor
The filter is one of the easiest restrictions to overlook because the blower may still sound completely normal.
As grease accumulates, air has to pass through a more restrictive surface before it even reaches the fan and duct.
Manufacturer guidance commonly places filter inspection and cleaning among the first troubleshooting steps for poor smoke and odor removal.
Remove only filters that the manufacturer’s instructions identify as homeowner-serviceable.
Then inspect for:
- heavy grease loading;
- clogged mesh;
- bent or damaged filter frames;
- incorrect filter orientation;
- filters that are no longer seated correctly.
Follow the manufacturer’s cleaning instructions.
Some metal grease filters can be washed.
Charcoal filters used for recirculation are different and commonly require replacement rather than washing. Follow the exact model instructions rather than treating every filter the same way.
After servicing the filter, compare hood performance again.
A substantial improvement tells you that airflow restriction existed before the blower.
No improvement means you continue down the system.
Step 3: Check Whether the Exterior Damper Opens
A ducted hood cannot exhaust effectively if the outlet remains partly closed.
Locate the exterior wall cap or roof termination if it can be viewed safely from ground level or another safe location.
Do not climb onto a roof merely to perform this diagnostic.
With the hood operating, observe whether an accessible exterior damper appears to open normally.
Problems can include:
- a stuck flap;
- debris;
- grease buildup;
- damaged hardware;
- nesting material;
- packing material left from installation;
- an exterior cover that does not move freely.
GE specifically lists an obstructed duct or damper that does not open freely among the reasons a hood may fail to remove smoke and odors.
The important lesson is broader:
the blower can work while the exhaust exit does not.
If the termination is blocked, replacing the hood will not fix the exhaust path.
Step 4: Diagnose the Duct as a Complete Airflow Path
If filters and the visible exterior termination appear normal, the hidden duct becomes more important.
A fan does not move its advertised airflow regardless of what is connected to it.
Installed airflow depends on resistance.
Possible problems include:
- a duct smaller than the hood manufacturer’s required outlet;
- an abrupt reducer;
- a tight elbow immediately above the hood;
- too many elbows;
- excessive equivalent duct length;
- corrugated or unsuitable duct material;
- crushed duct;
- partially disconnected duct;
- an internal obstruction;
- an exterior termination that adds excessive resistance.
This is why the number printed on the hood cannot describe installed performance by itself.
If the exact model, duct diameter, route, elbows, and termination have not been verified, use our range hood duct size guide before concluding that the blower is defective.
A useful diagnostic clue is noise without corresponding performance.
A restricted system can make a fan sound busy because it is operating against resistance.
Noise is therefore not a reliable airflow meter.
Step 5: Look at Where the Smoke Escapes
Now shift attention from the duct to the cooking plume.
Watch normal cooking from a safe distance.
You are not trying to create excessive smoke for a test.
Use ordinary cooking conditions that already produce the symptom.
Ask:
Does the smoke rise beneath the hood and fail to leave, or does it escape around the hood before entering?
That difference matters.
Smoke enters the canopy but removal is weak
Focus on:
- filter restriction;
- duct resistance;
- damper;
- installed airflow;
- building pressure;
- blower performance.
Smoke escapes around the front or sides
Focus on:
- canopy coverage;
- hood depth;
- hood width;
- mounting height;
- burner position;
- cross-drafts.
This is the point where many homeowners misdiagnose poor capture as “weak suction.”
Step 6: Compare Front-Burner and Rear-Burner Performance
This is one of the most useful real-world observations.
If smoke from rear burners enters the hood reliably but smoke from front burners frequently escapes, the system may not have a general airflow failure at all.
The hood may simply have insufficient effective coverage over the front cooking area.
Research into residential range hoods has repeatedly found that burner position influences capture efficiency, with front burners often presenting the more difficult condition.
That is why hood depth matters alongside width and CFM.
A shallow hood mounted high above deep countertops can leave front burners outside the strongest capture zone.
This problem cannot always be solved by cleaning a filter.
Step 7: Verify Mounting Height Before Buying a Bigger Blower
Broan-NuTone specifically warns that mounting a hood higher than its recommended range may reduce capture capability.
HKM already treats mounting height as a separate installation variable because there is no universal number appropriate for every hood and every cooking appliance.
Before altering the installation, verify the allowed range for the exact model using our range hood height above stove guide.
Do not lower the hood below the manufacturer’s permitted minimum simply because capture is poor.
Minimum clearances can exist for heat, operation, access, and appliance compatibility.
The correct objective is not:
get the hood as close as possible.
It is:
keep the hood within its permitted installation range while maintaining effective coverage of the cooking plume.
Step 8: Determine Whether the Hood Was Undersized From the Beginning
Sometimes every component is functioning normally.
The problem is that the installed system was never appropriate for the cooking setup.
A low-capacity hood may struggle when paired with:
- wider cooking surfaces;
- high-output cooking;
- frequent frying or searing;
- island installations;
- large front burners;
- professional-style equipment;
- poor capture geometry.
But do not respond by buying the highest-CFM hood that will fit.
HVI guidance treats airflow as a function of cooking-surface width and installation type, while manufacturer requirements become especially important with higher-output appliances.
Our range hood CFM sizing guide explains how airflow, cooking width, hood position, capture area, ducting, and noise should be evaluated together.
The diagnostic question is:
Was the system incorrectly sized, or has an originally adequate system stopped performing normally?
Those lead to different repairs.
Step 9: Use an Open Window Only as a Diagnostic Clue
There is one observation that can reveal a different category of problem.
Suppose the hood appears to perform noticeably better when a nearby window is opened slightly.
That does not prove that the house requires a particular makeup-air system.
And opening a window should not automatically be treated as the permanent solution.
But the change is diagnostically meaningful.
An exhaust fan removes indoor air.
A tight building has to replace that air from somewhere.
Large exhaust fans can depressurize a house when sufficient replacement air is unavailable. EPA and PNNL Building America both recognize depressurization and combustion-backdraft concerns associated with powerful kitchen exhaust.
If changing the available replacement-air path noticeably changes hood performance, building pressure deserves professional evaluation.
Read our range hood makeup air guide before assuming that a larger blower is the solution.
This becomes especially important where naturally drafting fuel-burning equipment exists within the building.
Step 10: Check for Cross-Drafts Around the Cooking Surface
A range hood is trying to capture a rising plume.
Strong sideways air movement can push that plume away before it reaches the canopy.
Possible sources include:
- a nearby supply register;
- ceiling fan airflow;
- an open exterior door;
- a strong window breeze;
- another fan;
- replacement air entering at excessive velocity near the cooktop.
If the hood performs well under calm conditions but poorly whenever strong lateral air movement exists, the problem may be plume disruption rather than blower capacity.
Do not permanently block required HVAC supply air just to improve hood capture.
The correct solution is to evaluate airflow distribution without compromising the larger ventilation and comfort system.
Step 11: Pay Attention to Changes in Fan Speed
Run only the normal operating controls specified by the manufacturer.
Listen and observe.
Does low speed sound different from medium?
Does high speed clearly increase fan activity?
Does the exterior damper move farther?
Does smoke capture improve?
If the sound changes substantially but performance does not, a restriction may be limiting the useful gain.
If one or more speeds do not operate normally, the problem may involve:
- controls;
- switches;
- wiring;
- motor electronics;
- blower assembly.
At this point the diagnosis is moving away from household airflow planning and toward appliance service.
Do not open electrical or motor enclosures unless the manufacturer’s documentation specifically provides a homeowner-serviceable procedure.
Step 12: Consider the Blower Only After the System Around It Makes Sense
Blower failure is real.
It is simply not the only explanation.
A service technician may investigate:
- blower wheel condition;
- motor performance;
- unusual bearing noise;
- loose or damaged components;
- speed-control problems;
- electrical faults;
- incorrect installation configuration.
But replacing a blower does not correct:
- a clogged exterior vent;
- undersized ductwork;
- a hood mounted too high;
- poor front-burner coverage;
- inadequate makeup air;
- a recirculating configuration being judged as an outdoor-exhaust system.
That is why the blower belongs near the end of a system-level diagnostic sequence rather than the beginning.
Why “It Feels Weak” Is Not an Airflow Measurement
Holding your hand beneath the hood can reveal obvious differences, but it cannot tell you the actual installed CFM.
Air velocity varies across the intake.
Hood geometry changes how that air is collected.
Filters change resistance.
The duct changes system pressure.
So avoid conclusions such as:
“It doesn’t feel like 600 CFM.”
You cannot verify that number reliably by hand.
Where actual delivered airflow matters—for example, after a major retrofit or when pressure problems are suspected—professional airflow measurement is more meaningful than subjective suction.
The HVI Certified Products Directory can help establish certified product performance, but the final installed system can still perform differently because the hood must operate through its actual duct and building conditions.
Do Not Confuse Loudness With Ventilation Performance
A loud hood may move a lot of air.
A loud hood may also be operating against a restrictive system.
Likewise, a quieter hood may perform well because:
- the duct is properly sized;
- the route is short;
- the canopy captures effectively;
- the fan is better isolated;
- airflow is being used more efficiently.
That is one reason replacing a weak-performing hood with “the loudest, highest-CFM model” is not a reliable design strategy.
Real performance is the result of a chain:
cooking source → plume capture → filter → blower → duct → damper → exterior → replacement air
Any weak link can reduce the outcome.
What If the Hood Worked Well Before and Is Suddenly Weak?
A hood that performed normally for years and then declined suggests a different diagnostic path from a hood that never worked well.
Start with things that can change over time:
- grease filters;
- charcoal filters;
- grease accumulation;
- exterior damper movement;
- exterior obstruction;
- duct contamination where accessible;
- fan damage or wear;
- control malfunction.
A geometry problem such as canopy depth does not usually appear suddenly unless the cooking setup changed.
A duct-sizing mistake does not normally emerge after years of good operation unless the duct was modified, damaged, or obstructed.
Timing is therefore diagnostic evidence.
What If the Hood Has Been Weak Since Installation?
If performance was disappointing from day one, prioritize:
- exact model configuration;
- duct diameter;
- reducers;
- duct length;
- elbows;
- exterior termination;
- mounting height;
- canopy width and depth;
- cooktop width;
- blower sizing;
- recirculation versus exterior exhaust;
- makeup-air requirements.
That pattern strongly suggests an installation or design mismatch rather than normal wear.
Before replacing the appliance, compare the existing installation with the manufacturer’s instructions.
A new hood connected to the same problematic duct may reproduce the same problem.
Clean, Repair, Redesign, or Replace?
The correct outcome depends on which layer fails.
Clean
Cleaning may be enough when performance improves after servicing:
- grease filters;
- accessible grease buildup;
- manufacturer-serviceable components.
Repair
Repair becomes more likely when:
- a damper is damaged;
- a control fails;
- fan speeds are abnormal;
- blower components are faulty;
- duct sections are disconnected or damaged.
Redesign
Redesign may be necessary when the underlying problem involves:
- undersized ductwork;
- excessive duct resistance;
- inappropriate mounting height;
- inadequate hood coverage;
- poor makeup-air strategy;
- unsuitable termination.
Replace
Replacement becomes rational when:
- the hood is fundamentally undersized for the cooking system;
- repair cost is disproportionate;
- required replacement parts are unavailable;
- the installed design cannot provide acceptable capture;
- the hood cannot be integrated properly with the required duct or ventilation strategy.
Replacing should therefore be the conclusion of the diagnosis, not the first step.
When to Stop DIY Troubleshooting
Professional evaluation is appropriate when:
- the duct disappears through inaccessible finished areas;
- roof inspection would be required;
- electrical covers or motor components would need to be opened;
- the exterior termination is inaccessible;
- combustion backdrafting is possible;
- the hood is high-CFM and building pressure is uncertain;
- major duct changes are needed;
- the installation differs from manufacturer instructions;
- actual airflow measurement is required;
- the blower produces grinding, burning odors, overheating, or abnormal electrical behavior.
If there is a burning electrical smell, visible arcing, smoke from the appliance itself, or repeated circuit tripping, stop using the hood and have the electrical/appliance problem evaluated.
Frequently Asked Questions
Why is my range hood running but not sucking smoke?
The fan can run while filters, ductwork, a damper, or an exterior termination restrict airflow. The hood can also move air normally while smoke escapes because of poor canopy coverage, excessive mounting height, burner position, or cross-drafts. Separate airflow failure from capture failure before replacing components.
Can a dirty range hood filter reduce suction?
Yes. Grease-loaded filters add resistance before air reaches the blower. Inspect and clean washable filters according to the manufacturer’s instructions. Recirculating charcoal filters may require replacement rather than washing.
Why does my range hood work better on the back burners?
Rear burners are often located more fully beneath an overhead hood. Front-burner plumes can escape the front edge more easily, especially when the canopy is shallow or mounted high. Burner coverage and hood geometry can therefore create different capture performance even at the same fan speed.
Why is my range hood loud but airflow weak?
Possible causes include a loaded filter, restricted duct, stuck damper, obstructed exterior cap, poorly designed duct route, or fan problem. Loudness alone does not confirm strong airflow.
Can mounting a range hood too high reduce suction?
Mounting height primarily affects capture, not merely motor suction. When the hood is above its intended mounting range, smoke and grease aerosols have more opportunity to spread before reaching the canopy. Follow the exact hood and cooking-appliance installation requirements.
Can opening a window improve range hood performance?
It can change building pressure by providing another path for replacement air. If hood performance changes significantly when a window is opened, treat that as a diagnostic clue rather than a permanent fix. High-capacity exhaust and combustion appliances may require professional pressure and makeup-air evaluation.
How do I know whether the range hood motor is bad?
Suspect an appliance fault more strongly when filters, duct, damper, installation geometry, and pressure effects have been excluded and the blower shows abnormal speed behavior, unusual noise, intermittent operation, or failure to respond normally to controls. Internal motor and electrical diagnosis is generally a service task.
Should I replace my range hood if it does not remove smoke?
Not until you know why it performs poorly. A new hood connected to the same restrictive duct, mounted at the same problematic height, or given the same inadequate replacement-air conditions may perform poorly too.
The Best Range Hood Repair Begins Outside the Motor
When a range hood is not pulling smoke, the blower is only one link in the ventilation chain.
Start with the symptom.
Determine whether smoke is missing the canopy or entering the hood but failing to exhaust effectively.
Then work through:
filter → termination → duct → capture geometry → CFM → building pressure → blower
That order prevents a common and expensive mistake:
replacing an appliance when the real problem is the system around it.
For the broader planning principles behind that system, return to the Kitchen Systems, Appliances & Efficiency Hub.
A well-performing range hood is not simply a powerful fan.
It is a coordinated path that captures contaminated air where it is generated and gives that air a low-resistance, correctly balanced route out of the kitchen.