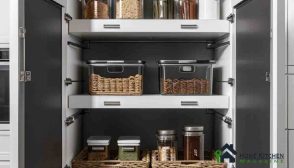
DIY kitchen storage ideas work best when each project solves a specific problem: wasted wall space, crowded cabinets, deep shelves, overloaded drawers, or countertops with nowhere for everyday tools to go. The 15 solutions below focus on practical, low-cost ways to create more usable storage with magnetic racks, tension rods, pegboards, pull-out shelves, cabinet-door storage, drawer dividers, and other simple DIY upgrades.
Start with the problem area instead of buying more organizers first. Measure the available space, check door and drawer clearances, and choose the simplest project that improves visibility, access, or vertical storage without making the kitchen harder to use.
Quick Answer: The most useful DIY kitchen storage ideas solve one specific space problem at a time. Use vertical dividers for trays and cutting boards, cabinet-door storage for lightweight items, pegboards or rails for unused wall space, pull-out shelves for deep cabinets, and bins or turntables for awkward corners. Measure the available space and clearance before installing anything.
Choose the Right DIY Kitchen Storage Fix First
Before starting a project, match the storage problem to the simplest fix that solves it.
- Crowded drawers: add dividers or vertical organizers.
- Unused wall space: install a pegboard, rail, magnetic strip, or wall-mounted rack.
- Deep cabinets: use pull-out shelves, bins, or a DIY lazy Susan.
- Overloaded countertops: move frequently used tools to walls, cabinet doors, or hanging rails.
- Small pantry shelves: use stackable containers, risers, labeled jars, or vertical dividers.
- Under-sink clutter: use removable bins or stackable organizers that still leave plumbing accessible.
Measure first, especially inside cabinets and behind doors. A storage idea is only useful if it improves access without blocking hinges, drawers, plumbing, appliances, or normal kitchen movement.
15 Creative DIY Kitchen Storage Solutions That Actually Work
1. Magnetic Spice Rack on the Wall or Fridge
A magnetic spice rack is one of the easiest DIY kitchen storage solutions when cabinet space is limited. Mount magnetic spice jars on the side of a refrigerator, a metal backsplash, or a securely fixed magnetic board so frequently used seasonings stay visible without taking up shelf space.
Before installing it, check the weight rating of the magnets and make sure the surface is suitable. Keep the jars away from direct heat, steam, and areas where they could be knocked loose. If your refrigerator side is not magnetic, a wall-mounted metal sheet or magnetic strip can provide the same storage function.
Best for: small kitchens, crowded spice cabinets, and renters who can use removable mounting systems.
Difficulty: Easy.
If spices are one of your main clutter points, see our guide to a spice rack with jars for additional ways to keep frequently used seasonings visible, grouped, and easier to reach.
2. Use Tension Rods to Organize Cutting Boards
Tension rods can turn a wide cabinet into vertical storage for cutting boards, baking sheets, cooling racks, and serving trays. Install two or more rods vertically so each item has its own slot instead of being stacked in a pile.
Measure the cabinet height and depth before buying the rods. Choose rods with enough tension to stay firmly in place, but do not overtighten them against thin cabinet panels. Leave enough space between each divider so boards and trays can slide in and out without catching.
Best for: base cabinets, narrow cabinets, and kitchens with stacked baking sheets or cutting boards.
Difficulty: Easy.
3. Repurpose Mason Jars as Pantry Organizers
Mason jars can turn loose packets of dry ingredients into compact, visible pantry storage. Use them for foods such as rice, oats, pasta, dried beans, nuts, seeds, or frequently used baking ingredients, provided the jars are clean, completely dry, and fitted with secure lids.
Choose jar sizes that match how quickly your household uses each ingredient rather than filling the shelf with oversized containers. Label each jar with the contents and, when useful, the purchase or transfer date. Keep heavier jars on lower shelves and avoid stacking glass jars unless the containers are specifically designed to stack safely.
Best for: open pantry shelves, small cabinets, bulk dry ingredients, and kitchens where food packets create clutter.
Difficulty: Easy.
If pantry shelves are your main problem area, see our pantry organization ideas for small kitchens for practical ways to group food, use shelf depth, improve visibility, and reduce wasted pantry space.
4. Install a Pegboard for Hanging Utensils
A pegboard can turn an empty kitchen wall into flexible vertical storage for utensils, lightweight pans, measuring tools, oven mitts, and other frequently used items. Because hooks can be moved, the layout can change as your storage needs change.
Before mounting the board, decide which items will hang there and check the wall material so you can use the correct anchors or screws. Leave enough clearance between the pegboard and the wall for hooks to fit properly, and avoid overloading a section with heavy cookware unless the board and mounting hardware are rated for the weight.
Best for: kitchens with unused wall space, limited drawer storage, and frequently used tools that need to stay visible.
Difficulty: Easy to Moderate.
5. Over-the-Door Shelf or Rack
The inside of a cabinet door can become useful storage for lightweight items that otherwise take up shelf or drawer space. Add a shallow rack, adhesive organizer, or small mounted shelf for foil, plastic wrap, measuring tools, spice packets, or other frequently used kitchen supplies.
Measure the clearance between the door and the cabinet shelves before installing anything. The organizer should be shallow enough for the door to close completely without hitting shelves, pipes, or stored items. Keep heavier products off thin cabinet doors unless the hinges and mounting hardware can safely support the added weight.
Best for: small kitchens, crowded cabinets, narrow pantries, and unused cabinet-door space.
Difficulty: Easy.
For kitchens where cabinet-door storage is only one part of the space problem, explore these kitchen storage solutions for small spaces to make better use of narrow gaps, vertical areas, cabinets, and other underused zones.
6. Pull-Out Drawers Inside Cabinets
Pull-out drawers or sliding shelves make deep lower cabinets easier to use because stored items come toward you instead of disappearing at the back. They work especially well for pots, pans, small appliances, food containers, and other items that are difficult to reach in a fixed cabinet.
Measure the cabinet opening, interior depth, and hinge clearance before choosing hardware. Make sure the slide system is rated for the expected load, and leave enough side clearance so the drawer can move without rubbing against hinges, pipes, or the cabinet frame.
Best for: deep base cabinets, lower cabinets, heavy cookware, and kitchens where rear cabinet space is hard to reach.
Difficulty: Moderate.
7. DIY Lazy Susan for Pantry or Corner Cabinet
A DIY lazy Susan can make deep pantry shelves and corner cabinets easier to use by bringing items at the back into view. Use a sturdy rotating base or turntable mechanism with a tray sized to the shelf so condiments, oils, canned goods, or spices can rotate without being stacked behind one another.
Measure the shelf diameter and vertical clearance before building or buying the rotating base. Avoid overloading the tray, and place taller or heavier containers toward the center so the unit stays balanced while turning.
Best for: deep pantry shelves, corner cabinets, condiments, canned goods, oils, and spice storage.
Difficulty: Easy to Moderate.
8. Wall-Mounted Pot and Pan Organizer
A wall-mounted pot and pan organizer can free up an entire cabinet by moving bulky cookware onto unused vertical space. Use a sturdy rail, rack, or hook system for frequently used pans, lids, and lightweight pots so they remain visible and easy to reach.
Choose a wall section away from direct cooking heat and high-traffic walkways, then anchor the organizer into wall studs or use hardware rated for both the wall type and the combined cookware weight. Leave enough spacing between hooks so pans do not collide or become difficult to remove.
Best for: kitchens with limited cabinet space, frequently used cookware, and unused wall areas.
Difficulty: Moderate.
9. Drawer Dividers Made from Cardboard or Wood
DIY drawer dividers can turn a mixed utensil drawer into defined storage zones for cutlery, cooking tools, measuring utensils, and small kitchen accessories. Cardboard works well for a quick, low-cost prototype, while thin plywood or finished wood is better for a more durable solution.
Measure the drawer’s interior width, depth, and height before cutting the divider pieces. Arrange the compartments around the tools you actually use instead of creating equal-sized sections, and make sure the dividers sit low enough that the drawer can close without catching on handles or bulky utensils.
Best for: utensil drawers, cutlery storage, baking tools, and drawers with mixed small items.
Difficulty: Easy.
If drawer dividers solve only part of your space problem, explore these small kitchen organizers for additional ways to use cabinet, wall, counter, and vertical space more efficiently.
10. Hang Measuring Spoons Behind Cabinet Doors
The inside of a cabinet door is an efficient place to store measuring spoons and lightweight measuring cups that are used frequently. Install small hooks, adhesive holders, or a slim rail so each piece has a dedicated spot instead of getting buried in a drawer.
Before mounting anything, close the cabinet door and check the clearance between the door and the shelves. Position the hooks where hanging utensils will not hit stored dishes, shelf edges, or cabinet hardware. For adhesive hooks, follow the manufacturer’s weight limit and surface-preparation instructions.
Best for: baking stations, crowded utensil drawers, and cabinets with unused door space.
Difficulty: Easy.
11. Stackable Bins for Under-Sink Storage
Stackable bins can make better use of the vertical space under a kitchen sink, but the layout should work around the plumbing rather than block it. Use removable bins for sponges, trash bags, dishwasher supplies, and other small items so the cabinet can be cleared quickly if the drain, trap, or supply lines need inspection.
Measure around pipes, valves, and the garbage disposal before choosing bin sizes. Keep frequently used items toward the front, avoid covering shutoff valves, and do not place bins where a small leak could go unnoticed for a long period.
Best for: under-sink cabinets with awkward plumbing, cleaning accessories, and small loose supplies.
Difficulty: Easy.
12. DIY Rolling Kitchen Island with Storage
A DIY rolling kitchen island can add both prep space and storage without permanently changing the room layout. Build or repurpose a compact cart with shelves, drawers, or open cubbies for cookware, pantry items, cutting boards, or frequently used appliances.
Measure the available floor space before choosing the island dimensions, including the clearance needed to open nearby cabinets, drawers, appliances, and doors. Use locking casters so the island stays stable during food preparation, and avoid making the unit top-heavy by placing heavier items on the lower shelves.
Best for: small kitchens, rental homes, flexible layouts, and kitchens that need extra work surface.
Difficulty: Moderate.
13. Create Vertical Shelves for Baking Sheets
Vertical dividers can turn a wide cabinet into separate slots for baking sheets, cutting boards, cooling racks, muffin tins, and serving trays. Storing these items upright makes each one easier to remove without lifting an entire stack.
Measure the cabinet height and depth first, then space the dividers according to the thickness of the items you plan to store. Fixed wood dividers provide a permanent solution, while removable wire or tension-style dividers are useful when you want a less permanent setup.
Best for: baking cabinets, tray storage, narrow base cabinets, and kitchens with frequently stacked bakeware.
Difficulty: Easy to Moderate.
14. Use Magazine Holders as Plastic Bag Dispensers
A magazine holder can be repurposed as a compact dispenser for reusable shopping bags, food-storage bags, wraps, or other lightweight kitchen supplies. Place it inside a pantry, lower cabinet, or under-sink area so loose bags stay contained instead of spreading across a shelf.
Choose a holder that fits the available cabinet depth and position it where items can be removed without pulling the entire organizer out. If storing reusable bags, fold or roll them before placing them inside so the holder does not become overfilled.
Best for: pantry shelves, under-sink cabinets, reusable bag storage, and small kitchens with loose packaging supplies.
Difficulty: Easy.
15. Label Everything for Efficiency and Style
Labels make DIY storage systems easier to maintain because every container, bin, drawer, or shelf has a clearly defined purpose. Use simple removable labels for pantry ingredients, baking supplies, cleaning accessories, or storage zones that may change over time.
Keep labels specific enough to be useful without creating unnecessary categories. For food containers, include the item name and, when relevant, the purchase, refill, or expiration date. Use labels that remain readable in the environment where they are placed, especially around moisture, grease, or frequent handling.
Best for: pantry containers, shared kitchens, bulk ingredients, storage bins, and frequently reorganized cabinets.
Difficulty: Easy.
Keep Your DIY Kitchen Storage Working Long Term
A storage project is only successful if it remains easy to use after the first few weeks. Build simple maintenance habits into the system instead of waiting for clutter to return.
- Declutter before reorganizing: Remove duplicate, expired, broken, or rarely used items before adding more containers or shelves.
- Keep frequently used items accessible: Store everyday tools between comfortable waist and eye level when possible, while occasional-use items can go higher or deeper inside cabinets.
- Leave some empty capacity: Avoid filling every bin, drawer, and shelf completely. A little spare space makes items easier to return and allows the system to adapt.
- Check mounted hardware periodically: Inspect hooks, rails, pegboards, adhesive mounts, and pull-out hardware for looseness, especially when they hold cookware or other heavier items.
- Clean around storage zones: Wipe shelves, bins, jars, drawer dividers, and cabinet doors regularly so grease and crumbs do not build up around the new system.
- Adjust the layout when habits change: If an organizer repeatedly becomes messy, the problem may be its location or category rather than a lack of discipline. Move or redesign it to match how the kitchen is actually used.
Tools and Materials for DIY Kitchen Storage Projects
You do not need every tool below for every project. Choose materials according to the storage idea, wall or cabinet construction, and the weight the finished organizer will need to support.
- Measuring and layout tools: Measuring tape, pencil, level, and ruler or square.
- Basic hand tools: Screwdriver set, hammer, utility knife, pliers, and appropriate fasteners.
- Power tools for mounted or built projects: Drill or driver and suitable drill bits when the project requires permanent installation.
- Common storage materials: Tension rods, pegboard, hooks, rails, bins, jars, drawer-divider material, shelving boards, and rotating trays.
- Mounting hardware: Screws, anchors, brackets, or other fasteners matched to the wall, cabinet, or shelf material.
- Finishing materials: Sandpaper, paint, stain, labels, or protective finish when needed.
Before drilling into a wall or cabinet, confirm what is behind the surface and use hardware appropriate for the material and expected load. For removable or renter-friendly projects, adhesive hooks and tension-mounted organizers can reduce permanent alterations, but their stated weight limits still matter.
Frequently Asked Questions About DIY Kitchen Storage
What are the cheapest DIY kitchen storage ideas?
Some of the lowest-cost options include drawer dividers made from cardboard, tension rods for vertical dividers, repurposed jars, hooks inside cabinet doors, magazine holders, and simple labels. Start with materials you already own before buying new organizers.
How can I add storage to a small kitchen without remodeling?
Use vertical and overlooked spaces first. Cabinet doors, empty walls, the sides of refrigerators, deep cabinets, and under-sink areas can often provide extra storage without changing the kitchen layout. Removable hooks, tension rods, pegboards, rolling carts, and freestanding organizers are useful options.
What DIY kitchen storage ideas are renter-friendly?
Tension rods, removable adhesive hooks, freestanding carts, drawer dividers, bins, jars, and removable cabinet organizers generally require fewer permanent changes. Always check the lease requirements and the mounting product instructions before attaching anything to walls or cabinets.
Should I buy organizers before measuring my kitchen?
No. Measure the width, depth, height, door swing, drawer clearance, and any nearby plumbing or appliances first. An organizer that fits the shelf but prevents a cabinet door or drawer from closing will create a new problem instead of solving one.
Start With the Storage Problem That Slows You Down Most
The best DIY kitchen storage ideas are not the ones that add the most organizers—they are the ones that make everyday tasks easier. Start with one problem area, such as an overloaded drawer, wasted cabinet depth, unused wall space, or a cluttered countertop, and choose the simplest solution that improves access.
Measure before installing, match hardware to the expected load, and leave enough clearance for doors, drawers, plumbing, and appliances. Once the first project works well in daily use, move on to the next problem area. Small, targeted improvements usually create a more functional kitchen than trying to reorganize everything at once.
For a visual guide on these ideas, check out this helpful video: