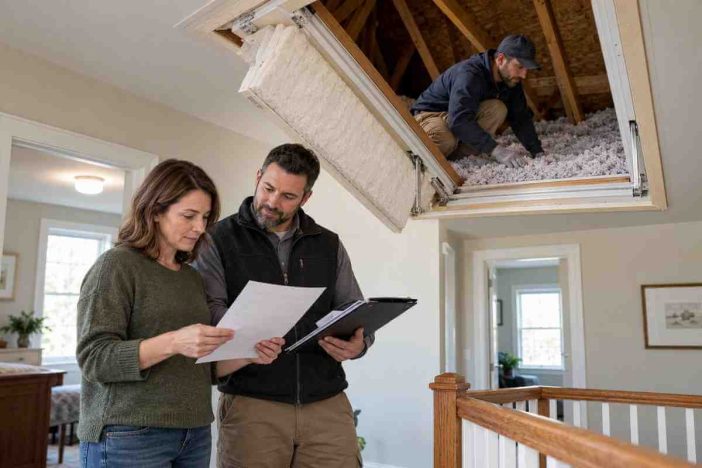
The attic was finished last month. The contractor brought in a blower, filled the space with fresh insulation, and left behind a receipt promising a better thermal barrier between the living rooms and the roof.
Then the utility bill arrived.
Nothing dramatic had changed. The upstairs bedroom still felt warm in the afternoon, the air conditioner seemed busy, and the monthly charge looked stubbornly familiar.
That is a frustrating result, especially after spending money on a project intended to improve comfort and efficiency.
But new attic insulation not lowering your energy bill does not automatically mean the contractor did a bad job. Nor does it prove that the investment was wasted.
A home’s energy use depends on the weather, heating and cooling equipment, air leakage, ductwork, insulation quality, household behavior, and utility pricing. Insulation affects some of those variables, not all of them.
The useful question is not simply whether the bill went down. It is whether the insulation addressed the energy problem it was supposed to solve—and whether the work was completed as specified.
Quick Answer: Why Didn’t New Attic Insulation Lower the Bill?
New attic insulation may deliver little visible change in a utility bill when the house still has substantial air leaks, leaking HVAC ducts, uneven insulation coverage, or another source of energy waste.
The bill may also reflect higher electricity rates, more severe weather, changes in occupancy, or increased energy use unrelated to heating and cooling.
Start with three checks:
- Compare energy consumption over similar weather conditions, rather than comparing dollar amounts alone.
- Review the contractor’s scope to determine whether air sealing, insulation coverage, ventilation protection, and relevant duct conditions were addressed.
- Look for evidence of remaining comfort problems, installation defects, or HVAC issues before buying additional insulation.
A professional energy assessment may be appropriate when the cause remains uncertain.
Do not disturb unfamiliar insulation, enter unsafe attic spaces, or attempt electrical, combustion, or HVAC repairs as part of a basic homeowner inspection.
1. The Bill May Be Hiding the Improvement
Insulation primarily helps limit heat transfer through the building assembly. It does not directly reduce every source of energy consumption.
If your electricity bill includes air conditioning, refrigeration, cooking, water heating, laundry, electronics, and outdoor equipment, any savings related to the attic may represent only part of the total.
A small improvement in one energy load can be difficult to distinguish from changes elsewhere.
Compare kilowatt-hours, not just dollars
Suppose a homeowner receives these hypothetical electricity bills:
| Billing detail | Before insulation | After insulation |
|---|---|---|
| Electricity used | 1,200 kWh | 1,100 kWh |
| Billing period | 30 days | 30 days |
| Illustrative variable rate | $0.15/kWh | $0.17/kWh |
| Variable energy cost | $180 | $187 |
The second period used 100 kWh less electricity, yet the illustrative energy charge was $7 higher.
That does not establish that the reduction came from insulation. It simply demonstrates why bill totals alone can conceal changes in energy use.
Actual bills may include delivery charges, fixed fees, taxes, time-of-use pricing, and other adjustments.
Check billing days
A 35-day billing period should not be compared directly with a 28-day period.
Calculate:
Average daily electricity use = total billed kWh ÷ number of billing days.
For example:
- 1,200 kWh over 30 days = 40 kWh/day.
- 1,100 kWh over 28 days = approximately 39.3 kWh/day.
The daily difference is much smaller than comparing the monthly totals alone might suggest.
Even this calculation does not account for weather.
Weather changes the comparison
If the month after installation was substantially hotter or colder than the month before, heating or cooling demand may have increased.
An energy improvement can reduce the amount of energy required under a given set of conditions while total usage still rises because outdoor conditions became more demanding.
For a meaningful comparison, consider:
- similar calendar periods in different years;
- heating or cooling degree days from a reliable local weather source;
- thermostat settings and occupied hours;
- major equipment changes; and
- whether the house uses electricity, gas, or another fuel for heating.
Heating and cooling degree days are useful indicators of weather-related demand, but they do not independently measure your home’s actual energy savings.
If you need to establish which household systems are consuming the most energy, our DIY home energy audit provides a broader evidence-first method.
2. Attic Air Leaks May Still Be Open Beneath the Insulation
One of the most important differences in residential energy performance is the distinction between insulation and air sealing.
Insulation resists heat flow through a building assembly.
Air sealing addresses unwanted movement of air through openings and gaps.
A thick layer of insulation can slow heat transfer, but it does not automatically close gaps around ceiling penetrations or framing connections.
For a typical vented attic, the ceiling plane usually forms the boundary between conditioned living space and the unconditioned attic.
That boundary may contain openings around:
- plumbing and electrical penetrations;
- wall top plates;
- attic hatches;
- recessed-light assemblies;
- dropped soffits;
- duct penetrations; and
- other framing cavities.
The U.S. Department of Energy’s Building Science Education guidance on existing attics recommends sealing appropriate attic-floor penetrations before installing new insulation.
Why installation order matters
When new loose-fill insulation covers the attic floor, the openings underneath can become difficult to find and access.
If the original project did not include air sealing, a second contractor may need to move suitable insulation temporarily to inspect and correct selected areas.
That is more complicated than addressing accessible leaks before the new insulation was installed.
However, not every attic should be opened or disturbed.
Homes with suspected asbestos-containing materials, unsafe wiring, moisture damage, inaccessible areas, or complex combustion-vent clearances require appropriate professional assessment.
What to look for in your invoice
Review the written scope for language that identifies actual air-sealing work.
Compare the following statements:
Vague: “Attic insulation upgrade.”
More informative: “Air sealing of accessible ceiling penetrations and top-plate gaps, with specified exclusions, before installing loose-fill insulation.”
The second statement describes a separate work activity.
If the contractor’s proposal says “air sealing included,” ask which locations were sealed, whether there are photographs, and whether any areas were inaccessible or excluded.
Do not assume the service was performed merely because insulation was installed.
3. The New Insulation May Be Uneven, Compressed, or Incomplete
Insulation does not provide uniform coverage simply because enough bags were delivered.
Its installed performance depends on the product, thickness, density where relevant, and continuity of coverage.
The ENERGY STAR guide to adding attic insulation emphasizes that insulation should be evenly distributed, including near the eaves where coverage can be difficult.
R-value is not the same as depth
R-value describes resistance to heat flow.
An inch measurement alone does not tell you the final R-value unless you know the product and how it was installed.
Different types of fiberglass, cellulose, mineral wool, and other insulation products can provide different thermal resistance per unit of thickness.
A contractor should be able to identify:
- the product installed;
- the proposed final R-value;
- the planned installed depth or other applicable specification;
- the area covered;
- whether existing insulation was retained; and
- how the completed installation was verified.
ENERGY STAR publishes recommended insulation R-values by climate zone.
These recommendations are not a substitute for local code, project-specific assembly design, or manufacturer instructions.
Why the edges matter
The middle of an accessible attic may look well covered while areas near exterior walls are thinner.
Insulation can also be displaced around equipment, access routes, ducts, and framing obstacles.
These gaps may create localized thermal weaknesses.
An owner-safe inspection from an attic opening may reveal obvious differences, but it cannot establish uniform coverage across an inaccessible attic.
Ask the contractor for installation photographs, product documentation, depth markers where applicable, and records of any areas that could not be reached.
Do not walk across exposed ceiling drywall or move through unfinished attic framing without a safe, purpose-built access route.
4. Ductwork in the Attic May Be Losing Conditioned Air
In many U.S. homes, part of the heating and cooling duct system runs through an unconditioned attic.
That creates a separate opportunity for energy loss.
If a duct connection leaks, conditioned air may escape before reaching the intended room. Poorly insulated ducts can also exchange heat with the surrounding attic.
Adding insulation to the attic floor does not automatically repair leaky ductwork.
This matters particularly when some rooms remain uncomfortable despite the insulation upgrade.
Symptoms that suggest a duct problem
Possible clues include:
- one room receiving noticeably less airflow than similar rooms;
- visible damage to accessible ductwork;
- disconnected or sagging duct sections;
- deteriorated insulation around ducts;
- unusual dust or pressure imbalances; and
- heating or cooling equipment running for long periods despite persistent comfort problems.
None of these symptoms alone proves that a duct is leaking.
Blocked filters, equipment performance, balancing, thermostat behavior, and other causes can produce similar symptoms.
A qualified HVAC professional can assess duct leakage, insulation, and airflow where appropriate.
Did the insulation work disturb a duct?
If comfort changed immediately after contractors worked around attic ducts, ask whether equipment or duct connections may have been affected.
Do not assume negligence without evidence.
Request an inspection, note when the problem appeared, and compare available photographs from before and after the work.
A damaged or disconnected duct should be corrected as an HVAC problem, rather than addressed by simply adding more attic insulation.
5. The Work May Have Changed Ventilation or Exposed a Moisture Problem
Vented attics generally require intended airflow pathways appropriate to their roof design.
Depending on the assembly, these may include soffit intake vents, baffles, ridge vents, gable vents, or other ventilation components.
New insulation should not block necessary openings.
ENERGY STAR explains that insulation baffles can preserve airflow channels near the eaves in suitable vented-attic designs.
But it is equally important not to apply vented-attic rules indiscriminately to conditioned or unvented roof assemblies. Those systems have different design requirements.
What if the soffit vents were buried?
If insulation obstructs required airflow paths, the installation may need correction.
Possible consequences depend on the design, climate, and moisture conditions.
Ask the contractor to explain how the proposed insulation arrangement preserves the roof assembly’s intended ventilation strategy.
Do not attempt to clear vents by crawling across an unfinished attic or pushing insulation near exposed wiring, fixtures, or structural hazards.
Wet insulation is not a normal efficiency issue
Signs of roof leaks, condensation, stained sheathing, damp insulation, or visible fungal growth change the priority of the project.
Moisture problems should be investigated before further insulation work.
ENERGY STAR specifically identifies wet or damp insulation, moldy or rotted attic framing, and vents exhausting into the attic as conditions requiring professional correction before continuing typical DIY attic work.
Adding another insulation layer over an unresolved moisture problem does not repair the source of water.
For other household upgrades, our guide to eco-friendly home improvements discusses why durability and performance must be considered together rather than treating every project as an isolated purchase.
6. The HVAC System May Be the Remaining Problem
An attic upgrade can reduce part of the home’s heating or cooling load without fixing a poorly operating HVAC system.
The equipment may still have problems such as:
- an excessively dirty or restrictive filter;
- poor airflow;
- incorrect controls or thermostat schedules;
- inadequate maintenance;
- damaged ductwork; or
- another mechanical fault requiring professional testing.
A homeowner may also notice little change because the system was already operating efficiently and the insulation improvement reduced only a limited portion of the total load.
Comfort and bills do not always move together
A homeowner might notice a more stable upstairs temperature while the utility bill remains similar.
That can be a real comfort improvement without proving a measurable reduction in total energy consumption.
Conversely, the utility bill may decline during mild weather even if the insulation project was poorly executed.
This is why evaluating a building-envelope upgrade needs more than one metric.
Useful observations include room-to-room temperature patterns, HVAC runtime where reliable records exist, utility energy consumption, and any professional assessment completed before and after the work.
Our broader energy-saving tips for the home can help identify which remaining household loads may deserve investigation once the attic project has been reviewed.
7. The Attic Was Not the Largest Source of Energy Waste
A home may have an under-insulated attic and still have other problems responsible for a larger share of its utility costs.
For example, consider a household with:
- significant hot-water use;
- an older and inefficient HVAC system;
- a pool pump operating for long hours;
- electric vehicle charging;
- a poorly performing secondary refrigerator; or
- substantial air leakage elsewhere in the building.
Improving attic insulation may be reasonable, but it cannot eliminate those unrelated loads.
Similarly, a room that remains uncomfortably warm might be affected more by direct solar gain through windows, duct problems, or HVAC distribution than by the attic floor alone.
An energy assessment can help determine which problem deserves attention rather than assuming the next solution must be more insulation.
The Evidence Matrix: Which Problem Should You Investigate First?
Instead of guessing from the monthly bill, compare the symptom with the evidence you actually possess.
| Observation | Possible explanation | Best next verification |
|---|---|---|
| Dollar bill higher, daily kWh similar | Rate or billing changes | Review tariff and billing period |
| kWh higher during extreme weather | Greater heating or cooling demand | Compare weather and operating conditions |
| Insulation installed but air sealing missing from scope | Remaining ceiling-plane leaks | Request scope records and professional assessment |
| One room still uncomfortable | Ductwork, insulation gap, solar gain, or HVAC balance | Room-specific HVAC and envelope review |
| Obvious thin areas or disturbed insulation | Uneven coverage | Review installation records and safe inspection evidence |
| Condensation or wet insulation | Moisture, roof, ventilation, or air-leakage problem | Stop additional insulation work and investigate |
| Whole-house energy use remains high year-round | Loads unrelated to the attic | Review appliance and base-load consumption |
This is a triage matrix, not a fault diagnosis.
It deliberately separates observable evidence from a possible explanation.
A homeowner who can make that distinction is in a better position to request an appropriate inspection or correction.
Your One-Page Post-Insulation Verification Record
Use this worksheet before contacting the contractor or paying for additional work.
| Item to record | Your finding |
|---|---|
| Date insulation was installed | |
| Contractor and installation reference | |
| Insulation product | |
| Existing insulation condition | |
| Target R-value stated in quote | |
| Air sealing included? | Yes / No / Unclear |
| Ventilation and baffles addressed? | Yes / No / Unclear |
| Attic hatch treated? | Yes / No / Unclear |
| Ductwork condition documented? | Yes / No / Unclear |
| Before-and-after photos available? | Yes / No |
| Current comfort complaint | |
| Utility consumption change | |
| Weather and occupancy differences | |
| Safety or moisture concerns | |
| Next responsible action |
The last row should describe a specific action supported by evidence.
For example:
“Ask the contractor for photographs and clarification showing whether accessible top-plate gaps were sealed before the new insulation was installed.”
That is more actionable than writing, “The insulation didn’t work.”
A hypothetical homeowner scenario
A homeowner spends $3,200 on attic insulation. The invoice says the crew added loose-fill insulation to a specified final level.
The following month, the electric bill is unchanged.
After reviewing the paperwork, the owner finds no clear air-sealing scope or installation photographs. Upstairs comfort remains uneven, and one supply register delivers weak airflow.
There are now at least three separate questions:
- Was the insulation installed to the agreed specification?
- Were ceiling-plane air leaks assessed and sealed?
- Is the uncomfortable room affected by a duct or HVAC distribution problem?
Replacing or adding more insulation without addressing those questions would be an expensive guess.
The $3,200 figure is illustrative, not an actual customer invoice or case study.
What to Request From the Insulation Contractor
A useful follow-up should concentrate on the original scope and measurable results.
Ask for:
- the product and final insulation specification;
- the measured area covered;
- installation depth or material quantity records as appropriate;
- before-and-after photographs where available;
- confirmation of which air-sealing locations were addressed;
- details of ventilation protection and baffles where relevant;
- treatment of the attic hatch and required fixture clearances;
- any noted duct damage, moisture problems, or excluded areas; and
- warranty terms and correction procedures.
If the original quotation did not include a particular service, do not automatically accuse the contractor of failing to perform it.
The issue may be that the initial project scope was too narrow to address the household’s actual energy problem.
That distinction matters.
A complete insulation job and a complete home-performance retrofit are not necessarily the same project.
When to Stop DIY Inspection
Attics can contain hazards that are not obvious from the opening.
Never move or disturb suspected vermiculite insulation. The U.S. Environmental Protection Agency advises treating vermiculite attic insulation as potentially asbestos-contaminated and leaving it undisturbed.
Do not attempt to clean it, sample it yourself, move it aside, or cover it during a DIY repair.
Other situations that warrant professional attention include:
- exposed or obsolete wiring, including knob-and-tube systems;
- suspected asbestos-containing materials;
- damaged electrical fixtures;
- unprotected recessed lights or hot flue assemblies;
- wet insulation, roof leaks, or visible mold;
- disconnected combustion exhaust components;
- damaged structural framing;
- unsafe access or insufficient footing; and
- signs that an exhaust fan discharges moisture into the attic instead of outside.
Combustion safety and ventilation must be considered when reducing uncontrolled air leakage.
Do not seal intentional outdoor-air ventilation openings or combustion-air supplies because they appear to be leaks.
For a home with complex conditions, a qualified energy assessor and appropriate trade professionals can determine what is safe and what needs correction.
How to Verify an Improvement Without Inventing Savings
A meaningful post-installation review combines documentation with performance data.
First, confirm what was installed
This may include a contractor walkthrough, inspection photographs, insulation product information, and applicable building or program verification requirements.
If the final scope cannot be established, start by clarifying the work before attributing performance problems to specific components.
Second, compare energy use under reasonable conditions
Use utility records and, where available, reliable HVAC monitoring.
Compare periods with similar temperature demands, occupancy, thermostat settings, and fuel use.
If the home’s heating system uses natural gas, electricity alone may not capture the energy change.
Do not calculate a guaranteed savings percentage from two unmatched utility bills.
Third, verify suspected defects
A blower-door test performed by a qualified assessor can help characterize overall building air leakage.
Targeted diagnostic methods may be needed to distinguish attic leakage from other leakage pathways. Infrared imaging can sometimes help identify temperature patterns when conditions support meaningful interpretation.
Neither test automatically identifies every defect or proves the amount saved by one specific measure.
Duct leakage testing and other HVAC diagnostics may be appropriate when room-level symptoms suggest a distribution problem.
Fourth, correct one identified problem and review again
Keep a record of the specific work completed, why it was recommended, and how performance will be assessed afterward.
If additional air sealing is needed, confirm that the work plan accounts for insulation access, material safety, combustion conditions, and the attic assembly.
Avoid paying for multiple overlapping upgrades before determining which problem they are intended to correct.
Questions Homeowners Commonly Ask
How long after adding attic insulation should I expect a lower energy bill?
There is no universal waiting period. Insulation affects heating and cooling demand when those systems operate, so the result may be difficult to see during mild weather. Several comparable billing periods and, ideally, weather-adjusted energy data provide stronger evidence than the first bill after installation.
Can air sealing still be done after new attic insulation was installed?
Sometimes, but suitable insulation may need to be moved temporarily so a qualified worker can access the air-leakage locations below it. The method depends on the attic, insulation material, and safety conditions. Suspected asbestos-containing material must not be disturbed as part of a casual retrofit.
Should I add more insulation if my upstairs rooms are still hot?
Not until you know whether insulation depth or coverage is actually deficient. Persistent upstairs heat may also involve solar gain, leaky ducts, airflow imbalance, or HVAC performance. An attic review should distinguish those causes before you purchase another layer of insulation.
Make the Contractor’s Work and the Energy Numbers Tell the Same Story
New attic insulation not lowering your energy bill is a reason to investigate, not proof of failure.
Check the energy comparison first. Then determine whether air sealing, insulation coverage, ventilation, ductwork, and installation details were adequately addressed.
If the original scope was incomplete, request a clear correction plan. If the installation appears sound, investigate the other systems that influence heating and cooling demand.
The objective is not to keep buying insulation until the bill changes.
It is to understand what the home needed, what the project actually delivered, and what evidence supports the next decision.
For a broader approach to measuring household efficiency improvements over time, visit the Sustainable & Efficient Living hub.