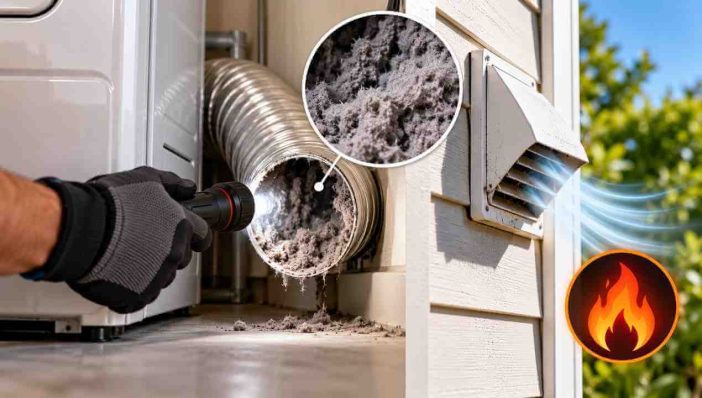
The towels are warm, the drum is turning, and nothing looks broken.
But a load that once finished in one cycle now needs another twenty minutes. Outside the house, the dryer hood barely moves. Behind the machine, a short section of duct has been nudged closer to the wall over years of laundry baskets, cleaning, and appliance movement.
There may be no dramatic failure to see. That is precisely why dryer exhaust problems are easy to normalize.
Restricted airflow usually announces itself through small changes in performance before it becomes an obvious maintenance problem. The useful question is not simply, “Is there lint?” Every vented dryer produces lint. The better question is whether air can still travel from the dryer, through the entire exhaust route, and outdoors without an abnormal restriction.
That is what a useful dryer vent inspection should determine.
Quick Answer: What Should a Dryer Vent Inspection Tell You?
A homeowner-level dryer vent inspection should answer five questions:
- Is a normal load taking noticeably longer to dry than it used to?
- Is the lint screen clean and correctly seated?
- Is the visible transition duct crushed, kinked, disconnected, or damaged?
- Does the accessible exterior hood open and exhaust air while the dryer operates?
- Are there warning signs that justify cleaning, appliance service, or a professional inspection of the complete duct route?
A clean lint screen does not prove that the duct inside the wall is clear.
Likewise, a dryer that still produces heat is not proof of healthy airflow. Some dryers can continue operating while reporting restricted airflow.
If you are performing a broader inspection of the property, our home safety inspection guide provides the system-level framework for checking problems before they become emergencies.
This article applies to vented clothes dryers. Condenser and heat-pump dryers that do not exhaust through a conventional exterior duct have different maintenance requirements; follow their manufacturer instructions.
Why Dryer Airflow Deserves More Attention Than Drying Time Alone
A vented dryer has to do two jobs at once.
It heats and tumbles the load, but it must also move warm, moisture-laden air out of the appliance and through the exhaust system.
If that path becomes restricted, the dryer may take longer to remove moisture.
The U.S. Fire Administration reports that failure to clean was the leading factor contributing to ignition in 31% of reported home clothes-dryer fires from 2018 through 2020, based on National Fire Incident Reporting System data.
That statistic should be interpreted precisely. It does not mean 31% of all dryers will catch fire, nor does it predict the risk of an individual installation. It shows why cleaning and airflow deserve a place in preventive maintenance.
The U.S. Consumer Product Safety Commission also warns that lint accumulating in a dryer or exhaust duct can restrict airflow and contribute to excessive heat buildup.
Maintenance, however, is only one layer of fire protection. Properly located and maintained alarms still matter. HomeKitchenMagazine’s smoke detector placement guide explains how detection fits into the wider home fire-safety system.
Before You Inspect: Define the Safe Boundary
A good inspection is not an excuse to dismantle an appliance.
Most homeowners can make useful observations without opening the dryer cabinet, disconnecting wiring, removing concealed ductwork, climbing onto a roof, or disturbing a gas connection.
You can usually inspect
- The lint screen.
- The area immediately around the dryer.
- A transition duct that is already safely visible.
- An exterior wall termination that can be reached from ground level.
- Drying performance and warning indicators.
- Visible lint, damage, compression, or disconnected sections.
Stop the DIY inspection when access requires
- Moving a dryer you cannot safely control.
- Disturbing a gas connector.
- Opening appliance panels.
- Working on electrical connections.
- Entering an attic or crawlspace that is unsafe to access.
- Climbing onto a roof to reach the exhaust termination.
- Disconnecting unfamiliar duct assemblies.
Do not use a candle, lighter, incense stick, smoke source, or other flame-based shortcut to “test” airflow. There is no reason to introduce an ignition source near a system you are inspecting for lint accumulation.
Smoke, sparking, visible scorching, an active burning odor, or a suspected gas leak is also not a routine inspection scenario. Stop using the appliance and obtain appropriate professional or emergency assistance.
Dryer Vent Inspection: A Practical Homeowner Check
The goal is to observe the system from one end to the other without pretending that visible sections reveal everything hidden inside walls.
Step 1: Establish a drying-performance baseline
Begin with a question that many inspections skip:
What changed?
Long drying time is more useful when compared with the dryer’s own previous performance.
Consider:
- Has a familiar load started needing a second cycle?
- Did performance change after the dryer was moved?
- Did the problem appear suddenly or gradually?
- Are only very large loads affected?
- Are clothes entering the dryer unusually wet because the washer is not extracting water effectively?
Comparing different fabrics, load sizes, and cycles can create misleading conclusions.
A heavy load of towels cannot be meaningfully compared with a small load of lightweight clothing.
Record the change before assuming the vent is responsible.
Step 2: Check the lint screen first
Remove and clean the lint screen according to the appliance instructions.
ENERGY STAR recommends cleaning the lint filter after every load to maintain airflow and efficiency. It also notes that dryer sheets can leave residue on some filters, reducing airflow over time.
Look for:
- Heavy lint accumulation.
- A screen that will not seat correctly.
- Tears or physical damage.
- Unusual residue.
- Surprisingly little lint compared with normal operation.
The last point is easy to overlook.
Some manufacturer troubleshooting guidance notes that restricted airflow can sometimes change how lint reaches the screen. Therefore, “there is hardly any lint today” should not automatically be interpreted as proof that the exhaust path is clear.
A clean lint screen is the starting point, not the entire dryer-vent inspection.
Step 3: Inspect the visible transition duct
The transition duct is the section connecting the dryer to the home’s exhaust duct.
Do not move a heavy appliance simply to complete this step. Inspect what is safely visible.
Look for:
- Crushing behind the dryer.
- Sharp kinks.
- A disconnected end.
- Tears, holes, or obvious deterioration.
- A route compressed because the dryer has been pushed too close to the wall.
- Visible lint around a joint.
A duct can be open yet poorly routed.
More length and more bends create additional resistance to airflow. Manufacturer installation instructions specify allowable configurations, so avoid adopting a universal internet rule for maximum duct length without checking the actual appliance and applicable requirements.
Step 4: Observe the exterior vent while the dryer operates
If the exhaust terminates through an exterior wall at a location that is safely accessible from the ground, observe it while the dryer operates.
The exterior damper or flap should be capable of opening as exhaust air reaches it.
Look for:
- A flap that does not open.
- Visible lint accumulation.
- Debris obstructing the termination.
- Physical damage.
- An obviously weak or absent exhaust stream.
Whirlpool and Maytag troubleshooting guidance describes a practical manufacturer-specific check: run the dryer for several minutes and assess air movement at the outside exhaust hood. Weak airflow may indicate restriction somewhere in the vent system.
Treat this as a screening observation, not a universal airflow measurement.
Different dryers, cycles, duct lengths, elbows, and installations can produce different outlet conditions.
Do not assign a pass/fail CFM number unless the manufacturer or a qualified technician provides a relevant specification for that installation.
And if the termination is on a roof, do not turn a maintenance check into a fall hazard. That portion belongs in a professional inspection.
Step 5: Look for restriction signals inside the laundry room
A vent problem is more convincing when several observations point in the same direction.
Possible signs include:
- Drying time increasing without an obvious load change.
- A vent-restriction or “check vent” indicator.
- Moisture remaining unusually long in the dryer.
- Excess heat or humidity accumulating in the laundry area.
- A visible crushed duct.
- Weak exterior exhaust.
- An exterior flap that does not open normally.
- Lint accumulating where it was not previously noticed.
None of these observations should be treated as a complete diagnosis by itself.
For example, slow drying can also result from overloading, a washer leaving clothes too wet, an appliance fault, a blocked lint screen, a heating problem, or an incorrect cycle.
The purpose of inspection is to narrow the problem intelligently, not declare a diagnosis from one symptom.
The Signal-Pair Rule: A Better Way to Decide What Happens Next
Homeowners often face the opposite problems: either ignoring symptoms for too long or assuming every warm dryer means the vent is dangerously clogged.
A more disciplined approach is to separate observations into three levels.
This is an HKM editorial decision framework, not a manufacturer code or regulatory standard.
| Inspection result | Examples | Next step |
|---|---|---|
| Baseline condition | Normal drying performance, clean screen, no visible duct damage, exterior flap operating | Record the inspection and continue routine maintenance |
| One soft signal | Slightly longer drying time with no other change | Clean the lint screen, compare like-for-like loads, and recheck visible airflow |
| Two independent restriction signals | Longer drying time plus weak exterior airflow; crushed duct plus Check Vent warning | Treat restriction as a credible possibility and arrange full vent inspection/cleaning |
| Immediate safety signal | Smoke, sparking, scorching, burning odor, suspected gas problem | Stop use and obtain appropriate professional or emergency assistance |
The value of the framework is that it prevents one weak clue from becoming a confident diagnosis.
Suppose towels suddenly need two cycles.
That is a signal.
Now suppose the lint screen is clean but the exterior flap barely opens.
That second, independent observation materially strengthens the case for checking the full exhaust route.
By contrast, if the dryer takes longer only when unusually large loads are used and exterior airflow appears normal, the vent may not be the only explanation.
Look for convergence, not drama.
What Long Drying Time Does Not Prove
“Clogged dryer vent” is an attractive explanation because it is simple.
Real troubleshooting is less convenient.
Longer drying can result from several different conditions.
The washer may be leaving too much water in the load
A dryer cannot efficiently correct for a washer that is failing to extract enough water.
If clothes enter the dryer much wetter than usual, investigate the wash/spin side of the process as well.
The dryer may be overloaded
An overcrowded drum can interfere with tumbling and airflow through the load.
Test performance with a normal, comparable load rather than immediately blaming the house duct.
The lint screen may be coated rather than visibly full
Some laundry products can leave residue on a screen.
The filter may look relatively clean while airflow through its mesh is reduced.
Follow the manufacturer’s cleaning instructions rather than using harsh chemicals or improvised cleaning methods.
The appliance itself may need service
A heating, sensing, blower, control, or other appliance problem can mimic some symptoms associated with bad venting.
If the vent route is verified clear and performance remains abnormal, appliance diagnosis becomes more important.
The exhaust route may be poorly designed rather than simply dirty
A long route, repeated elbows, crushed transition duct, or unsuitable configuration can create airflow problems even after loose lint has been removed.
That distinction matters because repeated cleaning will not correct an installation problem.
Do Not Confuse “Lint Screen Clean” With “Vent System Clear”
This is one of the most consequential maintenance misunderstandings.
The lint screen captures part of the lint produced during drying.
It does not capture everything.
Fine particles can travel into the downstream exhaust system and accumulate over time. Debris can also enter or obstruct the exterior termination.
That means there are at least three separate maintenance zones:
- Lint screen — frequent user maintenance.
- Accessible dryer-to-wall connection — inspection for damage and restriction.
- House exhaust route and exterior termination — periodic inspection and cleaning as appropriate.
Cleaning only the screen addresses Zone 1.
Vacuuming the first few inches behind the dryer does not establish that Zone 3 is clear.
A professional inspection becomes particularly useful when the route is long, concealed, has several direction changes, terminates on a roof, or has an unknown maintenance history.
How Often Should You Inspect and Clean a Dryer Vent?
There is an important distinction between inspection frequency and cleaning frequency.
The U.S. Consumer Product Safety Commission has advised consumers to clean lint from the vent pipe at least annually. Some manufacturer guidance from Whirlpool and Maytag describes cleaning home venting every one to two years or sooner when drying performance declines.
Those recommendations are not necessarily contradictory. They come from different types of guidance and different appliance contexts.
A practical prevention-first schedule is:
Every load: clean the lint filter as directed by the manufacturer.
During routine household maintenance: notice changes in drying time, heat, warning indicators, and the exterior vent if it is safely visible.
At least annually: include the dryer exhaust path in a documented maintenance review and follow applicable safety guidance regarding cleaning.
Immediately rather than on schedule: investigate when drying performance changes, a restriction warning appears, visible duct damage develops, or airflow at the exterior termination appears abnormal.
Your appliance manual, installation design, usage level, household conditions, and local requirements can justify a different service frequency.
A household running multiple loads every day does not impose the same load on a vent system as a dryer used a few times per month.
This is why an essential home maintenance checklist is more useful than relying on memory: recurring components can be scheduled, documented, and reviewed before symptoms become normal.
When a Professional Dryer Vent Inspection Adds Real Value
A professional should add information that a homeowner cannot obtain safely from a flashlight and an exterior visual check.
Depending on the installation and service scope, that can include:
- Assessing the complete exhaust route.
- Reaching concealed or inaccessible sections.
- Identifying excessive bends or problematic routing.
- Checking the exterior termination.
- Removing accumulated lint through the complete route.
- Identifying damaged transition material.
- Measuring airflow or pressure with suitable equipment.
- Comparing the installation with manufacturer requirements and applicable local rules.
- Documenting conditions before and after service.
Ask what the service actually includes.
“Dryer vent cleaning” can describe very different scopes of work.
A useful question is:
How will you verify that the complete exhaust route is clear after the work is finished?
A second useful question is:
Will you inspect the transition duct, concealed route, and exterior termination—or only clean from one end?
The answers are more informative than choosing a provider based only on a low advertised price.
Seven Dryer Vent Inspection Mistakes That Create False Confidence
1. Assuming a clean lint screen means the vent is clean
It does not.
The screen and house exhaust duct are separate maintenance zones.
2. Using drying time as the only test
Long drying is useful evidence, but it has multiple possible causes.
Combine performance changes with airflow and physical observations.
3. Looking only at the exterior hood
The termination can appear clear while a restriction exists farther upstream.
4. Cleaning only the first accessible section
Removing lint near the dryer can improve appearance without establishing that the entire route is clear.
5. Ignoring a crushed transition duct
A duct can become compressed when a dryer is pushed back into position after cleaning or servicing.
6. Trusting a warning light as the only inspection system
A check-vent indicator is useful when equipped, but a dryer without a warning does not automatically prove that every part of the vent is unrestricted.
7. Turning inspection into unsafe disassembly
Opening panels, disturbing electrical or gas connections, or climbing onto a roof can create risks greater than the maintenance problem you were trying to solve.
Know where homeowner observation ends.
Inspect the Whole Laundry Zone While You Are There
Preventive maintenance works better when homeowners inspect systems by location, not merely by individual appliance.
If you are already checking the dryer area, look around the laundry room without dismantling anything.
Notice:
- Water on the floor.
- Moisture staining.
- Damaged electrical cords or receptacles.
- Items stored against appliance vents.
- Washing-machine supply hoses with bulges, abrasion, corrosion, or unknown age.
- A floor drain, if installed, that is obstructed by stored items.
- Shut-off valves that are inaccessible behind clutter.
The washer presents a different risk profile from the dryer, but both can create significant household damage when hidden connections are ignored. Our washing machine hose replacement guide explains how to evaluate supply-hose age, damage, connections, and replacement decisions.
This does not mean every laundry appliance should be dismantled annually.
It means one maintenance visit should not create tunnel vision.
The Dryer Vent Inspection Record
An inspection becomes more useful when the next inspection can be compared with the last one.
Keep a compact record:
| Field | What to record |
|---|---|
| Dryer | Brand/model and vented or ventless configuration |
| Inspection date | Date of visual review |
| Typical drying performance | Normal cycle/load used for comparison |
| Lint screen | Clean, damaged, residue, or other observation |
| Transition duct | Normal, crushed, kinked, disconnected, unknown |
| Exterior termination | Opens normally, weak movement, obstructed, inaccessible |
| Warning indicator | None, Check Vent/airflow alert, other |
| Last full vent cleaning | Date/provider if known |
| Action | No action, recheck, clean, repair, professional inspection |
| Follow-up date | When the action was completed |
Do not fill unknown fields with assumptions.
Write “unknown.”
That single word is more useful than creating false maintenance history.
It also reveals what needs to be verified next.
When “Unknown” Should Trigger a Professional Check
An unknown vent history does not automatically mean the duct is unsafe.
But uncertainty matters more when combined with difficult access or performance changes.
Professional inspection becomes particularly reasonable when:
- You have moved into a home with no dryer-vent service history.
- The exhaust route disappears into walls or ceilings for a long distance.
- The vent terminates on the roof.
- The dryer was recently relocated.
- Drying time has changed significantly.
- The dryer reports restricted airflow.
- Visible transition ducting is damaged.
- Cleaning one accessible section does not restore expected performance.
- The exterior termination cannot be safely identified.
This is where preventive maintenance becomes a decision system rather than a recurring chore.
Frequently Asked Questions
Can I tell whether a dryer vent is clogged by checking airflow outside?
Exterior airflow is a useful screening check, especially when the hood is safely accessible, but it does not precisely measure every restriction. Compare the observation with manufacturer guidance and other symptoms. Weak airflow plus longer drying time provides stronger evidence than either observation alone.
Does a dryer vent need cleaning every year?
CPSC safety guidance has recommended cleaning lint from the vent pipe at least annually, while some manufacturer guidance describes one-to-two-year intervals or earlier cleaning when performance declines. Follow the appliance instructions and applicable safety guidance, and do not wait for a calendar date when restriction symptoms appear.
Should I clean a dryer vent myself or hire a professional?
A short, safely accessible system may allow homeowner maintenance when the manufacturer’s instructions permit it. Long concealed runs, roof terminations, uncertain routing, gas-appliance access, persistent airflow problems, or installations requiring disassembly are stronger reasons to use an appropriately qualified professional.
Can a dryer still work with a partially blocked vent?
Yes. Some dryers can continue operating while airflow is restricted, although drying performance may deteriorate and some models may display an airflow warning. Continued operation therefore does not establish that the vent is clear. Look at airflow, drying behavior, visible duct condition, and manufacturer guidance together.
Make Airflow Part of the Maintenance Record
The most useful dryer vent inspection does not end with “looks clean.”
It establishes what you could verify, what remains hidden, and what should happen next.
Clean the lint filter as directed. Watch for changes in drying performance. Inspect accessible ducting without unsafe disassembly. Confirm that an accessible exterior termination can exhaust air. And when several restriction signals appear together, inspect or clean the full route rather than repeatedly extending the drying cycle.
Then document the result.
That approach fits the larger system behind the Home Safety, Maintenance & Prevention hub: observe small changes, verify them early, and turn uncertain household risks into scheduled maintenance decisions.
A dryer does not need to fail before its exhaust path deserves attention.
Sources and Verification
This guide was developed against current safety and manufacturer guidance from:
- U.S. Fire Administration, including NFIRS data on contributing factors in home clothes-dryer fires.
- U.S. Consumer Product Safety Commission, including dryer lint, exhaust-duct, exterior-vent, and fire-prevention guidance.
- ENERGY STAR, for routine lint-filter and airflow-efficiency guidance.
- Whirlpool Product Help, for restricted-airflow indicators and exterior exhaust observations.
- Maytag Product Help, for vent routing, airflow, obstruction, and cleaning guidance.
Manufacturer recommendations vary by model and installation. Follow the instructions supplied with your appliance and applicable local requirements. This guide is intended for preventive homeowner observation, not appliance, electrical, gas, or building-code diagnosis.